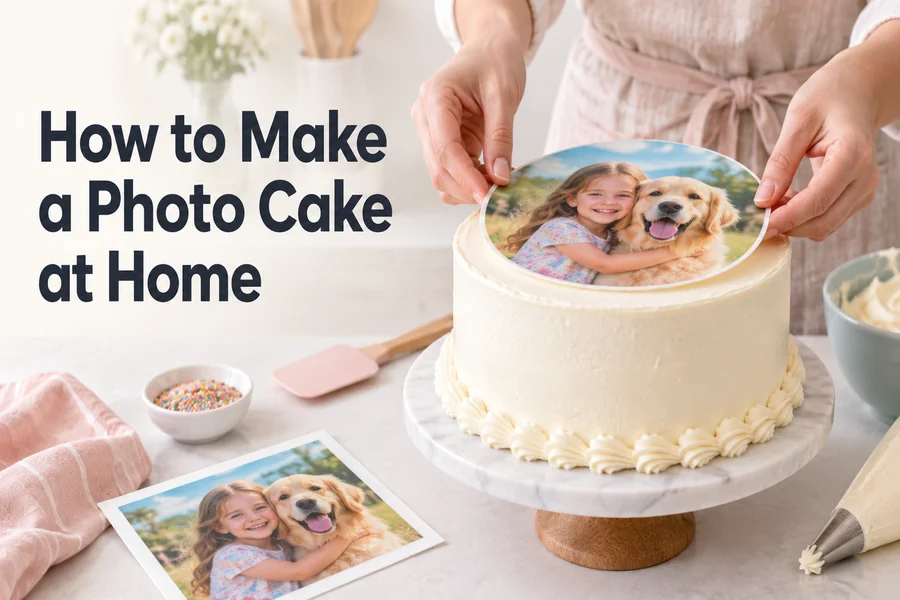
A photo cake might seem like a complex treat to make, but the process mostly revolves around three main steps: creating a level cake, preparing a smooth surface for the cake and applying an edible image. Understanding those procedures means you’ll be able to prepare your personal photo cake with the help of your family portrait, a birthday snapshot or a custom photo.
In this tutorial, we’ll learn how to make a photo cake safely, along with a recipe for making a vanilla sponge cake, buttercream amounts, edible printing tips and ways to overcome problems like wrinkles, bubbles and blurred colours.
If you don’t want to deal with food-grade printing equipment, you can order photo cakes with the image applied professionally.
- What Is a Photo Cake?
- Photo Cake Recipe at a Glance
- Equipment You Will Need
- Ingredients for the Vanilla Cake
- Ingredients for the Buttercream
- Choosing the Right Photograph
- Icing Sheet or Wafer Paper: Which Is Better?
- Icing Sheets
- Wafer Paper
- Food Safety Guidelines for Edible Printing
- How to Make a Photo Cake Step-by-Step
- Step 1: Preparing the Cake Tin
- Step 2: Mixing the Dry Ingredients
- Step 3: Creaming Butter and Sugar
- Step 4: Adding Eggs and Vanilla Extract
- Step 5: Adding Dry and Wet Ingredients
- Step 6: Baking the Cake
- Step 7: Preparing the Buttercream
- Step 8: Leveling and Covering the Cake
- How to Prepare the Edible Photo
- How to Apply an Edible Image to a Cake
- Step 1: Checking the Cake Surface
- Step 2: Removing the Backing
- Step 3: Positioning the Photograph
- Step 4: Smoothing the Photograph
- Step 5: Finishing the Border
- Possible Issues With Making Photo Cake and Their Solutions
- Can You Use Whipped Cream to Decorate a Photo Cake?
- Can You Prepare a Photo Cake Without an Edible Printer?
- How to Store a Photo Cake
- When Should You Apply the Edible Image?
- Frequently Asked Questions
- Can I Use a Normal Printer to Create an Edible Picture?
- What is the Best Type of Cake to Use for a Photo Cake?
- Should I Apply the Picture onto a Warmed-up Cake?
- Can I Put an Edible Image on a Chocolate Ganache Cake?
- How Long Can an Edible Photograph Stay on a Cake?
- Can I Freeze a Photo Cake?
- Is an Edible Photograph Safe to Eat?
- Why is my Edible Image Cracking?
- Tips for Your Final Photo Cake
What Is a Photo Cake?
Photo cake is decorated with an edible image on a special food-grade icing sheet. The photo is printed using edible ink and transferred onto the cake by applying a sheet of icing over a smooth buttercream or other coating.
The photograph is not directly used in decorating the cake. First, the photograph is converted into a digital image, which is then printed on an edible icing sheet and carefully transferred to the prepared cake surface.
Photo cakes are popular gifts on various occasions – birthdays, anniversaries, farewells and other family celebrations. They can include your family photograph, company logo or other image and customised message.
Photo Cake Recipe at a Glance
| Detail | Information |
|---|---|
| Cake size | One 8-inch round cake |
| Approximate servings | 8–10 |
| Preparation time | 30 minutes |
| Baking time | 30–35 minutes |
| Cooling and decorating time | 2–3 hours |
| Oven temperature | 175°C or 350°F |
| Cake flavour | Vanilla |
| Difficulty | Moderate |
| Best surface for the image | Smooth white buttercream or fondant |
Cooling time is important. Never apply an edible image to a warm cake or freshly applied buttercream, as heat and moisture might spoil the printed image.
Equipment You Will Need
Prepare the following equipment prior to starting:
- One 8-inch round cake tin
- Baking paper
- Two mixing bowls
- Electric hand mixer or stand mixer
- Measuring cups or kitchen scale
- Silicone spatula
- Wire cooling rack
- Serrated knife or cake leveller
- Offset spatula
- Cake smoother
- Edible icing sheet
- Food-grade edible ink
- An edible printing printer dedicated to food-grade printing only
If you don’t own an edible printer, order a pre-printed icing sheet from a bakery or food-grade printing provider. Do not try to use a printer that contains or has ever contained normal ink.
Ingredients for the Vanilla Cake
For one 8-inch round cake, you will need:
- 180 grams all-purpose flour
- 1½ teaspoons baking powder
- ¼ teaspoon salt
- 115 grams unsalted butter, softened
- 150 grams caster sugar
- 2 large eggs at room temperature
- 2 teaspoons vanilla extract
- 120 millilitres milk at room temperature
This recipe gives you one cake layer. In case you prefer a tall layered cake, prepare two layers and increase buttercream quantity accordingly.
Ingredients for the Buttercream
To create a smooth surface for applying the photo, you will need:
- 170 grams unsalted butter, softened
- 300 grams icing sugar, sifted
- 1 teaspoon vanilla extract
- 1–2 tablespoons milk
- A small pinch of salt
White or very light buttercream is preferable since dark frosting might affect the colours of the photo printed on the icing sheet.
Choosing the Right Photograph
The quality of the final print will never be better than the quality of the photo you choose. Always use the original photograph rather than download or print the photo from social media.
The best photo for printing should have:
- Good natural lighting
- A clearly visible subject
- Plenty of space around the main figure or object
- Minimal blur or noise
- Suitable shape for the cake
- No important details close to the edges
If you’re going to decorate a round cake, crop the photograph into a circle beforehand or leave extra space around the subject for cropping the image later. Double-check your spelling if you’re adding a name, date or a custom message.
Icing Sheet or Wafer Paper: Which Is Better?
Edible icing sheets and edible wafer paper both can be used for printing photos, but there is a difference between them.
Icing Sheets
Flexible icing sheets usually give a better result with clearly visible colours and details. Gradually disappearing into the buttercream or fondant, they will work better for portraits or detailed images.
Wafer Paper
Thinner wafer paper is often cheaper, but colours will look paler and its surface will remain noticeable. Wafer paper is good for shapes and toppers, but won’t give the same result for a photograph.
For decorating the photo cake, edible icing sheet or wafer is the right choice.
Food Safety Guidelines for Edible Printing
Never insert edible ink cartridges into a printer that has already been used with ordinary ink. Even after removing the cartridges, there might still be residues in the printhead and other internal printer parts.
Always use:
- A printer reserved for food-grade printing only
- Food-grade ink cartridges
- Food-grade edible sheets
- Clean utensils and dry hands
- Products stored according to the manufacturer’s instructions
Always check packaging since not every food-safe ink or edible sheet is food safe. If you’re unsure about the printer and ink, buy a professionally printed edible sheet instead of taking risks.
How to Make a Photo Cake Step-by-Step
Step 1: Preparing the Cake Tin
Preheat the oven to 175°C or 350°F. Grease the base and sides of an 8-inch round cake tin, then put baking paper into the tin.
Bring the butter, eggs and milk to room temperature before mixing. Using the ingredients of similar temperature guarantees a more even consistency of batter.
Step 2: Mixing the Dry Ingredients
Put the flour, baking powder and salt into a bowl and whisk them thoroughly.
Even distribution of the baking agent guarantees that the cake will raise evenly.
Step 3: Creaming Butter and Sugar
Put the softened butter and sugar into a separate bowl. Beat the mixture for three to four minutes until it becomes fluffy.
Do not rush at this step since it creates tiny air bubbles that will give your cake a soft texture.
Step 4: Adding Eggs and Vanilla Extract
Add the eggs one by one and mix for 10 seconds after adding each egg. Put the vanilla extract into the mixture.
If the mixture becomes somewhat curdled, add 1 spoonful of the dry mixture and mix it gently.
Step 5: Adding Dry and Wet Ingredients
Add 1/3 of the dry mixture and stir gently. Add half of the milk, then continue adding the dry and wet mixture alternately until all ingredients are mixed.
Mix the batter until the consistency becomes uniform. Overmixing might lead to cake becoming denser.
Step 6: Baking the Cake
Pour the batter into the prepared tin and level the surface. Bake for 30-35 minutes.
The cake is ready if:
- The surface bounces back from a gentle touch
- A toothpick inserted into the middle comes out clean
- The edges start to separate from the tin
Let the cake stay in the tin for 10 minutes, then transfer it to a wire rack and leave it to cool completely.
Step 7: Preparing the Buttercream
Mix the softened butter for three to four minutes until it becomes light-coloured and fluffy. Gradually add the sifted icing sugar starting from a slow speed to avoid scattering.
Add the vanilla, salt and 1 tablespoon of milk. Mix until the buttercream becomes smooth. Only after that, add the second tablespoon of milk if the buttercream remains too stiff.
The buttercream should become soft enough for smoothing and thick enough to retain its shape.
Step 8: Leveling and Covering the Cake
After the cake is cooled, remove any raised domes with a serrated knife or a cake leveller.
Apply a thin crumb coat over the cake. Refrigerate the cake for 20 minutes or until the layer is firm.
Apply another layer of buttercream and smooth the surface carefully. The final image will highlight any bumps, so pay attention to creating an even surface.
Refrigerate the cake until the second layer of buttercream is firm, but not frozen.
How to Prepare the Edible Photo
Resize the photograph to the right size and shape of the cake. Put the message before printing and double-check the preview.
Print the photograph using:
- A dedicated edible printer
- Food-grade edible ink
- The right side of the icing sheet
- The print settings specified by the manufacturer of the sheet
Leave the printed photo undisturbed for the period specified on the packaging. Keep the printed sheet away from direct sunlight, moisture and open air longer than necessary.
Don’t refrigerate an unused edible image unless its manufacture specifies to do it. Moisture and condensation might affect both the sheet and the printed image.
How to Apply an Edible Image to a Cake
Step 1: Checking the Cake Surface
The surface should be smooth, cool and slightly tacky. There shouldn’t be visible moisture or condensation.
If your cake has been taken from the refrigerator, wait until all visible condensation disappears.
Step 2: Removing the Backing
Handle the image with dry and clean hands. Gently peel the icing sheet off its plastic backing.
If the sheet doesn’t come off easily, don’t pull hard. Instead, follow the instructions of the manufacturer of the sheet since they might differ depending on the product.
Step 3: Positioning the Photograph
Holding the sheet above the cake, check its position before placing it on the frosting. Align the center and gently lower the photo on the cake.
Do not place the sheet on one side and drag it across the cake since this may tear it.
Step 4: Smoothing the Photograph
Starting from the center, gently smooth the sheet with your dry fingers or appropriate cake smoother.
Use light pressure while smoothing the sheet in order not to push buttercream out from beneath the sheet.
Step 5: Finishing the Border
Apply a piped buttercream border around the photograph to mask the cut edge and create a professional look.
You can use additional decorations, but not wet fruits and decorations.
Possible Issues With Making Photo Cake and Their Solutions
| Issue | Most probable cause | Solution |
|---|---|---|
| Blurry photograph | Low-resolution source image | Use the original high-resolution photograph |
| Colours start to bleed | Moisture or condensation | Apply the photo to a dry and cool surface |
| Sheet becomes wrinkled | Uneven frosting or trapped air | Smoothen the cake surface before applying and work from the center |
| Air bubbles appear | Image is placed too fast | Place it gradually and smoothen gently |
| Backing doesn’t peel off | Heat, humidity or improper storage | Follow the release instructions specified by the manufacturer |
| Sheet tears | Rough handling or excessive dryness | Seal the sheet until you’re ready to use it and handle it gently |
| Dark frosting affects the image | Thin and translucent icing sheet | Put a layer of white buttercream or fondant under the frosting |
| The photograph slides from its place | Soft frosting | Refrigerate the cake until the surface is firm |
| Print starts to crack | Sheet became dry | Keep it sealed until the application time |
Can You Use Whipped Cream to Decorate a Photo Cake?
You can sometimes use a whipped cream to place an edible image on it, but due to the higher moisture content, bleading and wrinkling are more likely to happen. The success also depends on the type of the icing sheet and stability of the cream.
For beginner decorators, buttercream or fondant will be more reliable surface. If you are going to use whipped cream, then place the image closer to the serving time and follow the manufacturer’s instructions for the edible sheet.
Can You Prepare a Photo Cake Without an Edible Printer?
Yes, you can bake and frost your cake, and order only the printed edible sheet from a specialized provider. Specify the required image dimensions and shape of the cake.
Another option is to order the whole cake to be decorated by a professional baker. For customers looking for local options, the collection of photo cakes in Delhi includes many options for different occasions.
Don’t apply ordinary paper photo directly to food. If you’re using a non-edible topper, attach it to a food-safe carrier and remove before serving the cake.
How to Store a Photo Cake
Storage depends on the cake filling and frosting. The cakes containing creamy filling should be refrigerated.
To keep the edible image safe:
- Store the cake in a box
- Avoid direct exposure to refrigerator moisture
- Avoid putting the cake beside uncovered food or liquid
- Avoid storing the cake near strong odours
- Don’t move the cake frequently between cold and warm environment
- Follow the storage instructions given by the manufacturer of the edible sheet
Due to condensation, a chilled cake should not be moved to a warm room immediately. Wait until it becomes warm in the closed box.
When Should You Apply the Edible Image?
The best time to apply the edible image depends on the frosting, icing sheet and storage conditions. For a home celebration, it’s better to apply the image after frosting the cake and chilling, preferably on the same day it is going to be served.
Applying the image too early might expose the print to excess moisture. Doing it in a hurry could turn decorating into an ordeal and prevent you from correcting any issues with positioning.
Always read and follow the instructions related to storing and applying the edible sheet.
Frequently Asked Questions
Can I Use a Normal Printer to Create an Edible Picture?
No. It’s never advisable to use a printer that was previously used with regular ink. Purchase an edible printer with edible ink and edible printing sheets.
What is the Best Type of Cake to Use for a Photo Cake?
You can choose any level vanilla, chocolate or red velvet cake. Its taste isn’t essential, but it must be smooth and white to ensure that your picture will look great on top of it.
Should I Apply the Picture onto a Warmed-up Cake?
No. It’s crucial that your cake is entirely cool at the moment you frost and decorate it. Heat can melt buttercream and spoil the picture.
Can I Put an Edible Image on a Chocolate Ganache Cake?
It may work in case the ganache is firm and doesn’t contain any moisture. Also, dark ganache may become visible through a thin sheet. You can add a fondant disc or a white buttercream layer under the picture to increase the quality.
How Long Can an Edible Photograph Stay on a Cake?
This question has no exact answer because the time depends on the icing sheet, frosting, humidity and storage conditions. To make sure that the result is perfect, apply it just in time before the celebration and follow the manufacturer’s instructions.
Can I Freeze a Photo Cake?
Yes, but freezing may cause some condensation. This way, it will be ruined when you take it out of the freezer. If your undecorated cake must be kept in the fridge, then apply the picture after you completely defrosted and dried it.
Is an Edible Photograph Safe to Eat?
It is supposed to be safe if you use food-grade ink, an edible printing sheet and equipment that is dedicated to food printing only. Always check the labels.
Why is my Edible Image Cracking?
This way, you have possibly left the sheet exposed to air for a long time or stored it in a dry place. Avoid opening the package until you use it and don’t bend the sheet.
Tips for Your Final Photo Cake
In order to learn how to make a photo cake, you needn’t be a professional baker. Just prepare yourself, pick a good photograph, print it safely and apply it only to a cold frosted cake.
Be careful during the last step. Make sure that your picture is placed correctly, start decorating from the middle of it and don’t let water touch its surface.
With all these precautions, you will be able to create an individual centrepiece that is both tasty and looks great.